Manage hierarchy permissions
You can set up access rules for hierarchy nodes in the Manage Inputs workspace. To do so, click the Permissions button on the
ribbon to open the Permissions For ... dialog.
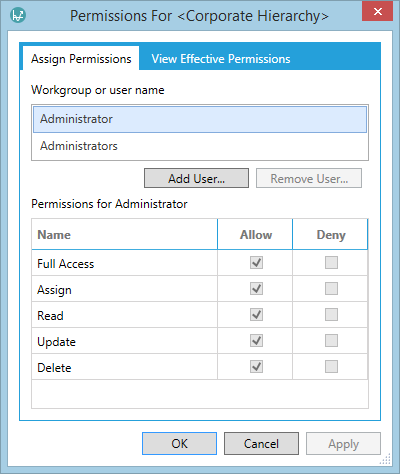
The permissions specified here work in conjunction with the permissions that are set by PlanningSpace tenant administrators. Permissions can be granted to individual users or workgroups. The screenshot below shows an example of the Permissions For ... dialog; note that the contents of the window will depend on where in the hierarchy it is opened.

The box at the top of the window lists all users and groups who currently have specified permissions for the active hierarchy. To set up permissions for another user or group, click the Add User button and select the required user or group.
If the Allow box is checked, then the user can perform the action. If the Deny box is checked, the action is forbidden and this will override any Allow permissions the user is granted based on its membership of workgroups. If neither box is checked, the permission will be inherited from other permissions.
The View effective permissions tab shows the actual access rights which a particular user has for the selected hierarchy node. These permissions are the 'sum' of permissions granted to a user at various levels.
The permissions options are explained in the table below.
| Permission | Description |
|---|---|
| Full Control | User/workgroup can view, edit and delete the node, and let other users define its permissions. |
| Assign | User/workgroup can grant any permissions to other users and groups. |
| Read | User/workgroup can view the node. |
| Update | User/workgroup can edit the node. |
| Delete | User/workgroup can delete the node. |
